
Two weeks ago I was awoken in the early morning to Devin saying something like, "Get the baby!" Instinctively, I leapt to my feet, but then froze in place, unsure of exactly why I was in survival mode.
"Bri, we need to get Oscar."
"Heh..." I was still quite sleepy. I heard something fall to the floor in another room. Something plastic and inconsequential.
"Do you not feel that?"
"I'm going to the bathroom." As I stood in the bathroom doorway I could hear the windows shaking as if from a very strong gust of wind.
This is my typical reaction to earthquakes. I don't seem to notice them, or process their occurrence until they're over.
Then, on Friday night, I was just climbing into bed (yes, ridiculously early) when I heard Devin's disturbed voice from down the hall.
"Are you feeling that?"
"What?"
"The earthquake."
"No. When?"
"Now."
"No."
"Really?"
"Yeah."
"Wow."
For the record, Oscar also didn't notice either of the quakes. And after Friday's I drifted merrily off to sleep while Devin, our resident seismologist, watched an hour of live news coverage on the quake, its aftermath, and its forecasted catastrophic implications.
The next morning, he proclaimed it was time to get our earthquake emergency kit in place. And that's what our weekend became. Keep reading if you want tips on how to assemble your own earthquake emergency kit for only 400 goddamn dollars.
STEP ONE: MAKE A LIST. QUESTION IT.
Write out a list of everything you're going to want to have in your 3-day worst case scenario kit. Don't know what you need? That's okay, neither does anybody else, which is why sites like ready.gov exist to help you. Once you've gotten ahold of the list, review it and start asking questions like, "Dust masks?" and "What do we need a local map for?" The answer to that second question, it turns out, is because you have to assume all satellites are down and therefore there is no GPS so if you need to limp yourself to a hospital or go on the run because your neighborhood's been overrun with looters, you'll know which way is which. "Isn't that more apocalypse than earthquake?" you'll ask. And so I'll tell you upfront that for planning purposes those two outcomes are completely interchangeable. Once you recover from that realization, the list-making stage becomes fun again, like planning for a family trip to the lake house. Let's make sure we have enough bedding and a warm jacket for cooler weather!
STEP TWO: THE LEAST SATISFYING SHOPPING TRIP EVER
We went to both Target and Home Depot to fulfill our list. It was a shopping trip that was unsatisfying for a number of reasons. First, I typically like to shop for things I want. A Target run is usually an enjoyable experience. An excursion to Home Depot signifies an improvement project for our home. Even when I'm just at the grocery store I can excuse the tedium because I know I'll get to eat all the things. But how can one take pleasure in a cart full of batteries, tarp, canned green beans and rubbing alcohol?
That brings me to my second point. What's worse than a cart full of stuff you don't want? A cart full of stuff you don't want and don't know if you'll ever use!
Because all of these little life-saving invaluable items add up, I was trying to curb unnecessary spending as much as possible. In the first aid aisle I wondered if I should buy one ace bandage or two. What were the chances of both of us spraining something? But then what if one person sprained two things? You can do the math on how many gallons of water you'll need to survive 3 days, but then any number you reach doesn't feel like a final answer. So we need 9 gallons? Maybe we should get 12. What if we are stranded for longer than a week? Should we get 50? How many will fit in the garage?
And that's the third reason this shopping trip is the worst. No matter how much you buy it doesn't feel like enough. It shifts your perspective and suddenly those folks from Doomsday Preppers don't seem so extreme. They really have thought of everything. Good for them. But you know what, I bet even they wonder if they've got enough homemade bison jerky to feed their underground family compound for twenty-five years.
STEP THREE: COME UP WITH A PLAN
Once you get home and unload the car, it doesn't take long to arrange your stockpile into a number of plastic bins. Seal them tight and set them aside. Hopefully you won't need them any time soon. Nah, who are we kidding? The Big One's right around the corner! Aren't you glad you got all those garbage bags to poop in like the list told you to?
Then, it's time to strategize your safety plan. Find the best place to take shelter during the quake. Locate your gas lines so you can turn them off in case the rumble damages them. As I'm typing this I realize I forgot to do that during the weekend's prep. I really have no idea where the gas line is in our house. It's times like these I wish there was a sort of personalized Google that I could subscribe to, one that told me answers to only questions about my own life. ("Where did I leave my sunglasses?" would be searched most often.) Regardless, I will say that when I locate the gas line I plan to stash a pair of pliers or a wrench nearby so I can have that on hand to turn it off when the time comes. Unless, of course, the gas line is controlled by a button or switch, which seems unlikely, but like I've said, I've never seen it!
STEP FOUR: POKE HOLES IN YOUR LOGIC
Once you've completely assembled your garage-based bunker, you're free to wonder if you've overlooked something. Or everything. Your thought process will be something like, "Ok, everything I need is in the garage. So even if the whole house falls down, I will be safe. But why would the whole house fall down and the garage remain standing? What makes the garage any more structurally sound? It isn't. What if the garage is the only part of the house that is demolished? Am I capable of removing roof chunks to free my precious supplies? You know what, it doesn't matter because there is nowhere in the house to put all this crap so it has to stay in the garage. Ok we're good. Wait! What if we aren't at home? I mean, we are away from home just as much as we're at home. What if we're all in the car running an errand on the west side? We won't have anything. Ok, we'll make a car kit as well. Two car kits, one for each. But there's no way we are ever going to live up to the kit in the garage. We'll just have to head for home no matter what because that's where our stuff is. Unless we're at the beach when it happens and there's a tsunami. Then we'll be dead."
Now you're ready for Step Five.
STEP FIVE: DESPAIR
The thing about assembling an earthquake survival kit is that it forces you to be so pragmatic that you temporarily forget that what you are actually preparing for is a desperate, scary circumstance. In Target, you throw a package of Oreos into your cart full of supplies thinking they'll make the post-apocalypse more fun. Let's see how fun they are when they are the last of your food and you're trading them for ammunition.
It's like when I was buying earthquake insurance from State Farm. Or rather, trying to get our agent to admit it was a waste of money. Him: "If you don't get it and an earthquake renders your house unlivable, you still owe the bank your mortgage. But, you could just declare bankruptcy."
Me: "Oh, I guess that's an option."
"Or, remember your homeowners policy covers fire. So if a gas line bursts or the quake otherwise causes your house to burn down, you'd be able to file a claim."
"Hey now there's an idea!"
I bought the policy anyway and sometime later stopped to reflect on the conversation. God, how depressing the whole thing is. We're talking about our home, our stuff, our well-being. And once we gather everything on the supplies list, come up with a communication strategy, anchor furniture to the wall, push glassware a little further back on the shelf... all that's left to do is wait.
Thursday, April 3, 2014

Tuesday, March 18, 2014
I Forgot About This Blog
I don't mean that I willfully ignored it in favor of completing other, more important tasks. I don't mean that I was feeling uninspired and took a break from posting. I mean I straight up legit forgot this blog existed. It's like this recurring nightmare I have where it's finals week in the spring semester and I have to take a test for a class I'd entirely forgotten to attend.
Just this morning, I had this feeling like there was something I was forgetting to do. I did a mental inventory of everything on my plate. Did I forget to pay a bill? Yes, obviously. Did I forget to email someone back? Without a doubt. Did I forget to empty the dishwasher? Order more diapers from Amazon? File income taxes? Yes. Yes. And yes. All the usual neglect was in order, so what more could it be?
Finally it dawned on me so here I am. Sorry about the break, folks. If it's any consolation, you haven't missed much. There's been little progress on the house since the great bathroom makeover. And god knows I don't go anywhere. But I do miss sharing all my daily nothings with you, so I'll get my act together. I promise.
Happy New Year!
Just this morning, I had this feeling like there was something I was forgetting to do. I did a mental inventory of everything on my plate. Did I forget to pay a bill? Yes, obviously. Did I forget to email someone back? Without a doubt. Did I forget to empty the dishwasher? Order more diapers from Amazon? File income taxes? Yes. Yes. And yes. All the usual neglect was in order, so what more could it be?
Finally it dawned on me so here I am. Sorry about the break, folks. If it's any consolation, you haven't missed much. There's been little progress on the house since the great bathroom makeover. And god knows I don't go anywhere. But I do miss sharing all my daily nothings with you, so I'll get my act together. I promise.
Happy New Year!
Tuesday, December 3, 2013
The Bathroom Makeover: Part Five (The End)
Okay we've reached the end. Apologies for dragging this out, but really I did it for your own good. If I'd tried to cram this all into one mega post you'd be even more bored than you are now. Could you imagine?
Anyway, after two weeks of ongoing work, performed in a cycle of great energetic spurts followed by a day or two of disinterest, the bathroom was done.
And the bathtub was totally wrecked.


All three prints came from the bottomless well of awesome that is Society6. If you haven't heard of the site before, you're welcome. And also, I'm sorry, because now you're going to want all the things.

For whatever it's worth, I installed a new shade over the window.

A glance at the cabinets before and after.


Also, a shout out to my new bathmats.
My masterpiece, the mirror.

 And because I was desperate to spray paint something else, I went for the light switch cover.

It's amazing what some paint and new fixtures can do to spruce things up! Actual remodeling will come... someday. But I'm completely satisfied for now.

Anyway, after two weeks of ongoing work, performed in a cycle of great energetic spurts followed by a day or two of disinterest, the bathroom was done.
And the bathtub was totally wrecked.

Bleh. It's ok. It came clean eventually after some persistent scrubbing using a toxic concoction of cleaning products, which also did away with a totally unnecessary layer of skin on my hands. Bonus.
Before I present the final product, one more look at where we began.

And now....
Wait for it....
The AFTER!

Let's take a look at some of the finishing touches.
Remember this rotting shower curtain rod?

Now take a look at my fancy new curved shower curtain rod, which was a pain to install (drywall anchors = evil), but absolutely worth it. Those extra four inches of showering space translate into real luxury.

The new curtain is actually a repurposed old one I'd been holding onto for a few years, proving once and for all the benefits of hoarding.

I'm very pleased with myself for this new towel ring. The one pictured is actually the second one purchased, as the first installation attempt went catastrophically wrong, though not in a way that makes for an amusing blog anecdote. Just... drywall anchors! But now it's sturdy and shining. Go me.

And remember the big boring wall?

Now, it's outfitted in marvelous art.

All three prints came from the bottomless well of awesome that is Society6. If you haven't heard of the site before, you're welcome. And also, I'm sorry, because now you're going to want all the things.

For whatever it's worth, I installed a new shade over the window.

A glance at the cabinets before and after.


Also, a shout out to my new bathmats.
My masterpiece, the mirror.


It's amazing what some paint and new fixtures can do to spruce things up! Actual remodeling will come... someday. But I'm completely satisfied for now.

Tuesday, November 26, 2013
The Bathroom Makeover: Part Four
Up until now, everything I've written about took place pretty much in one weekend. A weekend in which we even had time to go to the beach!

Then the work week hit and we fell into a weird lull. Every night I would do a little bit of something, but it never amounted to much. I couldn't find the motivation. I suppose that's what happens when you're working in a household with a second bathroom. You're never all that inconvenienced, even if it is oddly unsettling to use a different shower.
But yeah, there was still some progress. First of all, I painted the ceiling. I didn't take pictures of this because there wasn't much to see. Crisp white paint covering up old white paint. I will say that it was my first time ever painting a ceiling. Have you ever painted a ceiling? It's annoying, right? For one thing, you have to lean back at an angle that hurts your neck and shoulders. For another, the paint is super thick, so you have to press extra hard on the roller, thus exaggerating your neck and shoulder pain. But, at the same time, the thick paint isn't thick enough to prevent massive drippage off the roller and into your eyeballs.
As for choosing the paint color, this was the first time I ever actually purchased and utilized paint samples. Typically I just pick something off the color swatch and hope for the best, with about a 50% success rate.
And while I'll ultimately be glad I took the thorough approach and worked with paint samples, in the short term I was kicking myself. You see, while out picking up the samples on our umpteenth trip to The Home Depot, we were also gathering other supplies for the project. After I grabbed our samples from the paint counter, I wandered absentmindedly over to the shelves looking for spackle while carrying Oscar on my hip. I was half aware that he had gotten ahold of one of the sample jars, but I was busy with the task at hand. As I was saying to Devin, "I'm trying to find that spackle that starts out pink then changes color when it dri---" I felt a sudden burst of coolness on my leg. I looked down and spent what felt like ten minutes processing what I was seeing.
The paint was everywhere. Well, not so much on Oscar, which I find a bit suspect, but all over me. And the floor. I shot Devin a panicked look and asked, "What do I do?" Within seconds, a kind and very forgiving employee came over with paper towels and set to work cleaning it up. I kept jumping in to help him, believing his, "It's okay, I got it," was far too generous and maybe insincere. I think actually he really did want me to leave. Eventually I relented and we slinked out of the aisle and, subsequently, out of the store. I wanted to take a picture of the whole grisly scene, but Devin was barely holding it together and I was afraid if he caught me taking out my iPhone to document it, he'd about lose his dang mind.
Anyhoo, there was enough paint left in the jar to paint a swatch on the wall, alongside two other contenders. I also added a splash of the cabinet's paint, which was supposed to help guide our decision, but instead gave a fecal effect to the whole ensemble.

And also, I'm not sure what's the matter with the paint on the left there. We didn't end up picking it, but not because it was drippy. The one in the middle also did not get picked and that was the one involved with The Home Depot fiasco. All that ruined wardrobe for nothing.
That means the winner is, paint #3!

Okay, thanks for hanging in there, folks. Almost done... stick with us for the next thrilling installment.


Then the work week hit and we fell into a weird lull. Every night I would do a little bit of something, but it never amounted to much. I couldn't find the motivation. I suppose that's what happens when you're working in a household with a second bathroom. You're never all that inconvenienced, even if it is oddly unsettling to use a different shower.
But yeah, there was still some progress. First of all, I painted the ceiling. I didn't take pictures of this because there wasn't much to see. Crisp white paint covering up old white paint. I will say that it was my first time ever painting a ceiling. Have you ever painted a ceiling? It's annoying, right? For one thing, you have to lean back at an angle that hurts your neck and shoulders. For another, the paint is super thick, so you have to press extra hard on the roller, thus exaggerating your neck and shoulder pain. But, at the same time, the thick paint isn't thick enough to prevent massive drippage off the roller and into your eyeballs.
As for choosing the paint color, this was the first time I ever actually purchased and utilized paint samples. Typically I just pick something off the color swatch and hope for the best, with about a 50% success rate.
And while I'll ultimately be glad I took the thorough approach and worked with paint samples, in the short term I was kicking myself. You see, while out picking up the samples on our umpteenth trip to The Home Depot, we were also gathering other supplies for the project. After I grabbed our samples from the paint counter, I wandered absentmindedly over to the shelves looking for spackle while carrying Oscar on my hip. I was half aware that he had gotten ahold of one of the sample jars, but I was busy with the task at hand. As I was saying to Devin, "I'm trying to find that spackle that starts out pink then changes color when it dri---" I felt a sudden burst of coolness on my leg. I looked down and spent what felt like ten minutes processing what I was seeing.
The paint was everywhere. Well, not so much on Oscar, which I find a bit suspect, but all over me. And the floor. I shot Devin a panicked look and asked, "What do I do?" Within seconds, a kind and very forgiving employee came over with paper towels and set to work cleaning it up. I kept jumping in to help him, believing his, "It's okay, I got it," was far too generous and maybe insincere. I think actually he really did want me to leave. Eventually I relented and we slinked out of the aisle and, subsequently, out of the store. I wanted to take a picture of the whole grisly scene, but Devin was barely holding it together and I was afraid if he caught me taking out my iPhone to document it, he'd about lose his dang mind.
Anyhoo, there was enough paint left in the jar to paint a swatch on the wall, alongside two other contenders. I also added a splash of the cabinet's paint, which was supposed to help guide our decision, but instead gave a fecal effect to the whole ensemble.

And also, I'm not sure what's the matter with the paint on the left there. We didn't end up picking it, but not because it was drippy. The one in the middle also did not get picked and that was the one involved with The Home Depot fiasco. All that ruined wardrobe for nothing.
That means the winner is, paint #3!

Okay, thanks for hanging in there, folks. Almost done... stick with us for the next thrilling installment.

Thursday, November 21, 2013
The Bathroom Makeover: Part Three
With paint fumes still lingering in the air, and evening approaching on day one of our project, we turned our attention to the cabinets.

First things first, I removed the paint splatter china pattern handles and set them aside.

Then I wondered why I was setting them aside because, seriously, what plans did I have for them in the future? Then I threw them in the trash.
Next I gave the cabinets a thorough cleaning. I swear, I'm cursed to always live in places with grody old cabinets. Have you ever cleaned out 50 year old cabinets? Like stuck your full torso in to reach the sticky back corners, and collect on your sponge what you hope to be coffee grounds but which you truly know are mostly likely mouse droppings? I really hate it.
Once that was over with and I wanted to barf, it was time to sand down the surfaces. I removed the drawers and took them outside so I could work in fresh air for a little while.
God these are gross and terrible. Is it possible these ever looked nice and new?

With sanding complete, I began to paint with our chosen high gloss mocha brown.
 While waiting for the first coat to dry, we tore off the floral patterned contact paper to reveal... gah!... more contact paper. This second layer came off without trouble in some places. In others, it left a liquidy glue goop. And in others, like in the furthest cabinet to the left, it appeared to have been adhered with some kind of permanent sealant developed by NASA.
After an hour spent peeling away the paper, molecule by molecule, I debated how bad it would really be if I just painted over it. I wondered what would happen next time I wanted to refinish or repaint them.
Then I was like, shut up, inner idiot. The next time anything happens to these cabinets it'll be a contractor ripping them out to make way for my jacuzzi tub.

And so I painted right over the paper. By the second coat, you couldn't see the pattern at all, though you could see the slight layer difference at the paper's edge.
By the time I went to bed, two coats were complete.

A few days later, once the paint dried and I did about three rounds of touch ups, I screwed in the new cabinet handles and drawer pulls.

Oh, it's starting to look like a real bathroom. Brings a tear to my eye. Stay tuned!

First things first, I removed the paint splatter china pattern handles and set them aside.

Then I wondered why I was setting them aside because, seriously, what plans did I have for them in the future? Then I threw them in the trash.
Next I gave the cabinets a thorough cleaning. I swear, I'm cursed to always live in places with grody old cabinets. Have you ever cleaned out 50 year old cabinets? Like stuck your full torso in to reach the sticky back corners, and collect on your sponge what you hope to be coffee grounds but which you truly know are mostly likely mouse droppings? I really hate it.
Once that was over with and I wanted to barf, it was time to sand down the surfaces. I removed the drawers and took them outside so I could work in fresh air for a little while.
 |
| It's becoming a fact of nature in my household I simply cannot look anywhere without a toy car behind in my field of vision. |

With sanding complete, I began to paint with our chosen high gloss mocha brown.

After an hour spent peeling away the paper, molecule by molecule, I debated how bad it would really be if I just painted over it. I wondered what would happen next time I wanted to refinish or repaint them.
Then I was like, shut up, inner idiot. The next time anything happens to these cabinets it'll be a contractor ripping them out to make way for my jacuzzi tub.

And so I painted right over the paper. By the second coat, you couldn't see the pattern at all, though you could see the slight layer difference at the paper's edge.
By the time I went to bed, two coats were complete.

A few days later, once the paint dried and I did about three rounds of touch ups, I screwed in the new cabinet handles and drawer pulls.

Oh, it's starting to look like a real bathroom. Brings a tear to my eye. Stay tuned!
Wednesday, November 20, 2013
The Bathroom Makeover: Part Two
With a gameplan in place and 10% off coupon for Home Depot, it was time to get to work!
And where do you think I began?

Yes! With the mirror of doom that looks like it belongs in a kids' hair salon.
Since I couldn't take out the whole mirror, nor remove the cemented-on tiles, the only choice was to paint over them. I first thought of the obvious white or black, but that didn't seem right. Then I started to think of textured mirror frames in a more general sense, and began envisioning metallics.

Gold paint would probably be too bold, but maybe bronze...
Off I went to the Home Depot paint department, unsure of exactly what I was attempting to purchase. I came across a collection of Martha Stewart decorative accent paint in small jars and called over a store employee for her advice. After I gave her my entire life story as a preamble to the question, "Will this paint work on plastic tiles?" she redirected my focus to spray paint. Of course. Spray paint. It's so simple...
She walked me over to the locked cage wall of spray paint, and then to the Rust-Oleum products in every metallic shade imaginable. I went for the darkest brown/bronze option, chestnut.
 Once home, Devin and I prepped the mirror.

Then, I got to work. The very first spray across the tiles and I knew I'd made the right choice. By the end of the first coat, I was completely elated, and high as a kite from the fumes, which actually probably had a lot to do with the elation.

After an hour, I applied the second coat, which also went smoothly and without incident. Eagerly, I ripped off all the paper to admire the results. Here's a sneak preview.

A rich color with just a hint of sparkle. And, yes, it does sort of look like Fiber One 80 calorie chocolate cereal.

But that's okay. I still pretty much want to spray paint my entire life now.
If you're wondering what happened to the bonus tiles...

Devin chipped them off using a hammer and chisel while I was at work one day. I'm really sorry I missed it.

Stay tuned for the big reveal of the complete Bathroom Makeover! Which, at the rate I'm posting, will hit the blog late February.
And where do you think I began?

Yes! With the mirror of doom that looks like it belongs in a kids' hair salon.
Since I couldn't take out the whole mirror, nor remove the cemented-on tiles, the only choice was to paint over them. I first thought of the obvious white or black, but that didn't seem right. Then I started to think of textured mirror frames in a more general sense, and began envisioning metallics.

Gold paint would probably be too bold, but maybe bronze...
Off I went to the Home Depot paint department, unsure of exactly what I was attempting to purchase. I came across a collection of Martha Stewart decorative accent paint in small jars and called over a store employee for her advice. After I gave her my entire life story as a preamble to the question, "Will this paint work on plastic tiles?" she redirected my focus to spray paint. Of course. Spray paint. It's so simple...
She walked me over to the locked cage wall of spray paint, and then to the Rust-Oleum products in every metallic shade imaginable. I went for the darkest brown/bronze option, chestnut.


Then, I got to work. The very first spray across the tiles and I knew I'd made the right choice. By the end of the first coat, I was completely elated, and high as a kite from the fumes, which actually probably had a lot to do with the elation.

After an hour, I applied the second coat, which also went smoothly and without incident. Eagerly, I ripped off all the paper to admire the results. Here's a sneak preview.

A rich color with just a hint of sparkle. And, yes, it does sort of look like Fiber One 80 calorie chocolate cereal.

But that's okay. I still pretty much want to spray paint my entire life now.
If you're wondering what happened to the bonus tiles...

Devin chipped them off using a hammer and chisel while I was at work one day. I'm really sorry I missed it.

Stay tuned for the big reveal of the complete Bathroom Makeover! Which, at the rate I'm posting, will hit the blog late February.
Thursday, November 14, 2013
The Bathroom Makeover: Part One
With all of the terribly urgent home repair projects out of the way, we've officially completed Phase 1. Now we're sitting restlessly in Phase 2, which will go on for however long it takes for us to hire a contractor to do something major, thus ushering in Phase 3. Until then, we'll be doing anything we're capable of doing ourselves.
Putting all of my Modern Lodge aspirations aside for the moment, I focused my energy on this hot mess of a bathroom.

Here's a closer look at what we're working with.

There's certainly something circus-like about it. I believe it's largely owing to the unique tiles around the mirror.

The funny thing is, this almost seems like the kind of misguided project I would do myself and then immediately regret. But I'd forgive myself. It's a lot harder to take when it's inherited.
Oh, and then, as a bonus, these 3 tiles glued to the wall to the right of the mirror.
 |
| Why? |

I've never been completely sure if they're coated in varnish that had aged and oranged, or just a thin coating of orange paint.
Either way, they have no business being matched with these handles.

So once you get over this initial shock, as I have, you can focus your attention on smaller details. Like this grotty shower curtain rod.
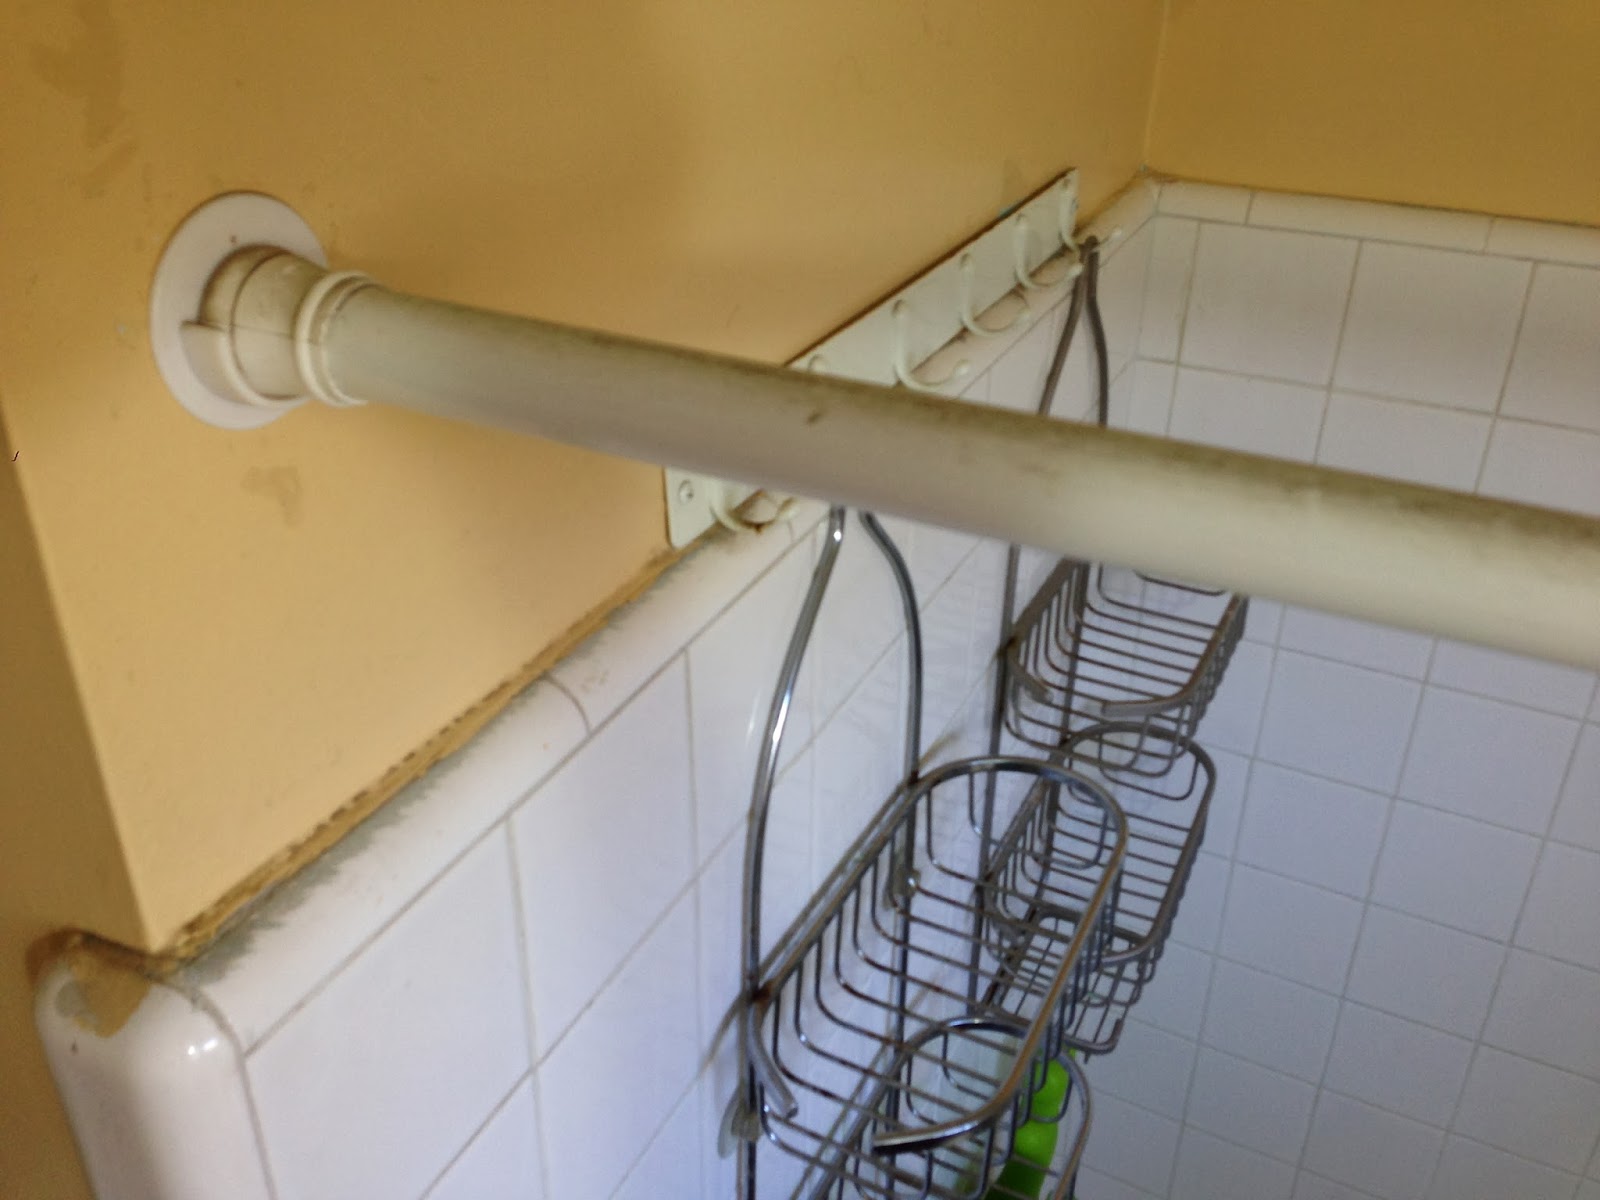
Or this towel hook surrounded by nothingness on a slimy french vanilla wall.

That hook is situated so low on the wall that any robe, towel or clothing item hangs half-rumpled on the floor.
Speaking of the floor, it's the only part I don't hate. Which is good, because I can't change it right now.

To clarify the parameters of this makeover project (and I'm using the term makeover because renovation or remodel implies structural change), here's what's up for grabs:
- Any painted surface - walls, ceiling, cabinets
- Knobs and handles
- Any fixtures - hooks, rods, racks
- Window treatments
- Rugs, accessories, decor
And what has to stay:
- The whole sink, countertop, and cabinetry area
- The shower and its tiles
- The medicine cabinet because I don't trust myself to tear it out and replace it
- The floor
At the start of this project the only work I'd done on the whole room was replacing the toilet seat because the original one was busted and falling off. Incidentally, if you're looking for a project to do that makes you feel accomplished but is really simple, try swapping out your toilet seat. Your friends won't be impressed, but you'll sleep well that night.
Stay tuned for the rest of the series...
Subscribe to:
Posts (Atom)
