It began like many an overly ambitious DIY misadventure, with a trip and fall down a Pinterest rabbit hole. Back in January, I was attempting to pin my way out of the ModLodge wallpaper fiasco and before I knew what was happening, I was creating a "Kitchen" board and filling it with terrible ideas like "How to pour concrete countertops over existing tile." I mean... Could you even imagine?
Thankfully I could only wander so far because back in the real world, I had a living room to put back together. But without a doubt, there was a little spark, a precocious little voice saying, "Well, maybe, just maybe..."
The last work I'd done on the kitchen involved wallpaper removal and a fresh coat of paint on the woebegone walls and ceiling. Nothing revolutionary, but it went a long way. Or, as long of a way as I thought possible without calling in the contractors and tapping into the hefty nest egg we've set aside for home renovations and which doesn't exist.
Also, I didn't hate the kitchen. Sure it had gross old cabinets, but as I've said before, so has practically every place I've ever lived, so I'd be lost without them. The countertop tiles wouldn't be my pick, but at least they were a pleasant shade of blue.
It may not have been the E.T kitchen of my dreams, but it was, I don't know... Home Alone? I could live with that.
Then a funny thing happened. Our fridge died suddenly one day. The next day, so did our dishwasher. I was glad to see them go, happy to see them replaced by gleaming, silent, energy efficient, spacious, not-all-weird-smelling new ones. They were glorious. And wedged between the ancient artifacts we called cabinets, they looked tragically out of place.
Aaaaand now I hated the kitchen.
But what was I supposed to do? Since Pinterest got me into this mess, I returned to see if it could get me out of it. I set about free form pinning until a pattern emerged.
Gray cabinets.
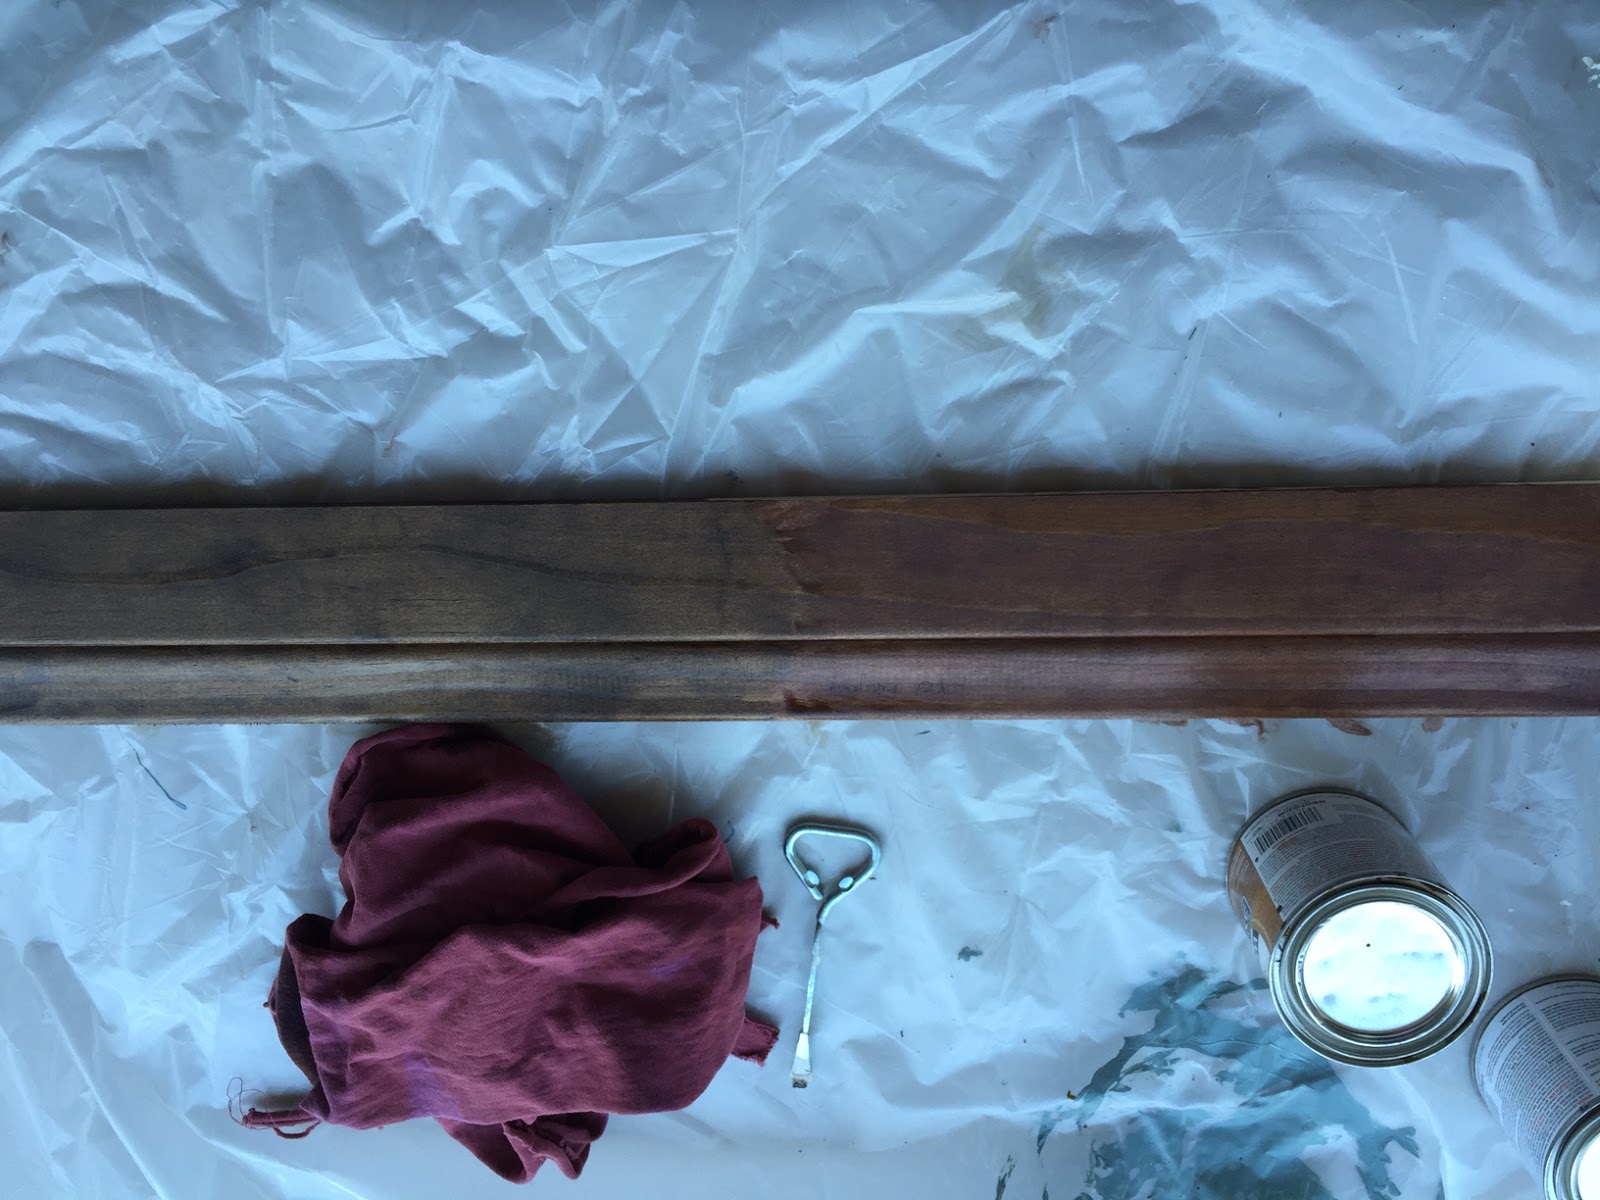
Ok. Yes. I could do this. Painting cabinets wasn't new to me. It's time consuming, but the results are dramatic and (unless everything goes wrong) very satisfying.
I wanted to make sure this particular paint job would be durable, so I combed Pinterest, taking in every opinion and tutorial until I found one blog post by Designer Trapped In A Lawyer's Body that just made sense to me. You can read the full post here, but to summarize, this blogger painted her kitchen cabinets using Milk Paint from General Finishes.
I had never heard of Milk Paint and didn't know what makes it different from regular latex paint (I still don't, to be honest) nor had I heard of General Finishes, but I liked their branding. Or lackthereof. It was industrial, professional grade, no frills. As if their slogan would be "We make paint." If I'm being smart, that probably is their branding, to appeal to dumbies like me who think using a serious paint with an eagle on it is going to somehow reduce the likelihood of making silly mistakes. The realistic advantage of using this type of paint is that you don't need to sand or prime, it dries exponentially faster than latex paint, shows virtually no brush strokes, and is very resilient. Sure. Sold.
With the paint plan in place, I came back to the tougher question to answer. What was I going to do about these counters?
If spending money wasn't an option, and it truly, almost hilariously wasn't, this left me with 3 ways out.
1. Some kind of cheap replacement like Ikea butcher block countertops. I found a few DIY bloggers who'd successfully installed these on their own, but it seemed like an awfully high risk undertaking. It was unlikely I'd be able to remove the existing counters without destroying the cabinet frames underneath. And even if I did, the idea of cutting out holes for the sink and faucet made me feel like I was going to pass out.
2. Learn to love the tiles as they were. But where's the fun in that?
3. Paint the tiles.
People say mixed things about painting tiles, so to try to learn more I poked around on YouTube, finding tutorials made almost exclusively by Australians (what's going on with the tiles down under?) and pinned a couple of blog posts about it. But I was still hesitant, until DIY Dave sent me a link to tile painting from This Old House. "Fine," I thought, "if This Old House would do it, then it must be legit."
So there you have it. Painting and lots of it. A game plan for what would be the last makeover this kitchen would ever, could ever, receive. I knew it would be a lot of work. But I had no idea just how much until I was in too deep.
Wednesday, November 18, 2015
Wednesday, November 4, 2015
Lost and Found
A new project is underway in the kitchen and boy is it a doozy! Plenty of coverage will be coming your way, but in the meantime I wanted to take this opportunity to share with you some life changing wisdom: if you lose an object, don't worry because it'll turn up.
You've probably heard this on many occasions, offered by some well-meaning person in close proximity to you while you tear apart your house, car, or purse, practically foaming at the mouth as you look for whatever's slipped into that weird dimension where things go when they're missing. You'll hear that useless combination of words, "don't worry, it'll turn up," and answer with the only polite response there is: "Yeah, I know." But what you really mean is, "Shut up and help me!"
Because from the outside, you look like you just need to chill out, while inside you're struggling with the unfairness of it all. "It was right here a minute ago. Right fucking here. And now it's just gone!"
And while the other members of your search party will offer their time, energy, and helpful suggestions, you will resent them because you know there's no way they care about the misplaced object as much as you do.
You will say things like:
"Did you move it? Because I deliberately put it here so it didn't get lost and now it's gone and I didn't move it."
"Someone must've stolen it."
"Maybe it got thrown in the trash." (Always it comes to this, but when has this ever been the answer?)
And, when it comes to missing remote controls, "Stand up. You're probably sitting on it."
In short, when you lose something, you become this and you know it.
If you haven't caught on yet, I'm writing "you" while meaning "me." But also, you. We're in this together. So why am I attempting to placate you by telling you that in times like these you only need remember that things always turn up? Because lately I've discovered that it's completely, almost miraculously true.
These days, I've had a lot of practice misplacing things. Daily. Hourly. Everything. Always. I'm typically doing three things at once, while mentally preoccupied with a fourth or fifth task. But no one thing is being done well, least of all, holding onto something I've picked up. I set things down everywhere without realizing it. Or sometimes I put things in special places where they won't get lost but fail to note the location of that special place. And then there's the general messiness that surrounds me.
So when I'm rushing around, usually in the mornings before work, I will inevitably reach the point where I can't find my keys, my glasses, or one or both of Oscar's sneakers. I get riled up, grumpy, quicken my pace as I stomp through the house looking in all of the usual spots. Then I'll get distracted by some other pressing matter, put my search on hold to attend to it for a moment, and POOF the sneaker materializes on the arm of the chair. Like magic. I'll pick up Milo's lunch box and POOF my keys are underneath. I'll decide to put in my contacts instead of wearing my glasses, and POOF, the glasses show up in the bathroom drawer that I open to grab contacts.
The more I took note of this phenomenon, I started putting it to work, consciously telling myself the one thing that no one wants to hear when they are looking for a lost item, "Don't worry. It will turn up." And then always, it would. Often within minutes. Though sometimes it takes a little bit longer.
Months ago I somehow lost one earring from one of my favorite pairs. I loved them because they were the sort of pair you could combine with any old outfit to make a statement. That statement being something like, "See? I tried." And the only thing worse than having one of the earrings go missing is that I had no idea when or how the pair had been separated. One morning, I could only find one in the bathroom drawer where I often threw them. I took everything out of that drawer and looked around. I went into the bedroom and searched on the dresser where I'm supposed to keep all of my jewelry and it didn't turn up there either. I felt myself getting riled up, but instead I told myself it will turn up.
But it didn't. A few weeks went by and I looked around in the usual places once again, this time also checking purse pockets and my underwear drawer, in case it had somehow fallen in there. More time passed. Then on Monday morning, I opened the drawer to my nightstand to see if I had any thank you cards left from an old box of stationary. As luck would have it, I had one card left, and stuck to that card... my missing earring. I literally said out loud, "My earring!"
And that did it for me, confirming what I'd come to believe is a law of physics, or nature or Murphy or whatever you want to call it. You don't find things, things find you. With all you have on your plate, with all of the lifehacks on your Pinterest that you'll never put to practice, with the Holidays approaching and ready to compromise your sanity, here's one simple thing you can do. Stop looking. I'm telling you this now because you need to hear it. And if I tried to tell you while you were looking for your iPhone you'd probably bite my head off.
Friday, October 16, 2015
This Stupid Doorway Part 2
If you're just joining us, here's what you missed in part one:
- Demolition
- Complaints
- Shopping
- Emotional turmoil
- General grumpiness
And basically, I managed to get my hands on all the pine boards and casing I'd need to construct the doorway of my dreams.
First up, I'd need to stain everything. At some point during the lull in production since February, I had managed to test out some stain options on a spare board.
Starting from the bottom in this picture, we have Golden Oak, which was a nice color but too light (it is actually lighter in person). Then Walnut, which matches the house's orange glow finish we're trying to avoid. Next up is Red Mahogany, which showed promise. Then at the top, I thought I'd give English Chestnut another chance. While it had turned out to be too dark when applied to the window frame, it wasn't actually a bad color. When we tried it on the test board, it turned out to be a different shade than the window frame. It's magical, I tell ya.
I was leaning toward the Mahogany up until the morning I was set to stain. Then I had a change of heart, drawn to the English Chestnut. It was clean and modern, nicely highlighting the wood grain. It looked natural. The Mahogany was purple and cheesy.
We lined up all the wood on a table outside and got to work.
Before applying stain, I rubbed down the boards with Minwax Pre-Stain, which is supposed to encourage even staining and prevent marbling on soft, absorbent woods like pine. It was an easy enough step that did no such thing, as the stained boards turned out uneven and marbled.
Also, they were neither the color of the window frame, nor the test board, but a completely original third version of English Chestnut. But whatever.
Once the wood dried it was time to start hanging, a task I went into with zero confidence. But I immediately felt more at ease when all of the pieces fit perfectly into place, thanks to my careful measuring and, more importantly, Tino's precise cutting.
We attached them to the frame using finishing screws, following the recommendation of DIY Dave. All of my research instructed me to use finishing nails. But finishing nails are meant to be used with a nail gun, and the nail gun I intended to borrow from our friends turned out to require, as all nail guns do, an air compressor the size and shape of an Airstream trailer. Meanwhile, finishing screws require a plain old screw gun, a power tool I already knew how to manage
I used too many screws, but in the end, I had the whole door jamb hung. Taking no time to celebrate, I moved on to hanging the casing. This is where things went wrong. The screws wouldn't go all the way through in seemingly random places, but then they also wouldn't retreat out of the holes when I determined I needed to start over, so I'd wind up ripping everything down, banging the screws out backward with a hammer, and making a bunch of excess holes. This happened twice and I gave up for the night. Then I resumed work the following evening after work, only to have it happen again.
Finally, I realized that this stubborn screw occurrence wasn't random at all. The screws only went through when they were grabbing onto the wood frame, rather than the plaster wall alongside it. Uh duh. These plaster walls have been a nuisance at every turn, and I should've known these itty bitty screws would never be able to break through.
Once I reached that conclusion, I made sure to drill only into the wood frame and I rather quickly hung the casing on both sides of the doorway, in both the hallway and the ModLodge.
However, when it came time to hang the top pieces, I found that my "just drill into the wood frame" plan only worked if there was a wood frame to drill into. But what was I supposed to do when all I had was a hot mess of busted plaster and exposed... chicken wire?
Against my better judgement, I first tried to use nails, just to see if I'd have any luck. The nails went in okay, but then using only the slightest force, I could take the casing back off, bringing hefty chunks of plaster down with it.
If only there was another way to go about this....
Of course! Glue! Wait, no that doesn't sound technical enough... Adhesive! Yes!
That weekend I went to the store to pick up some Liquid Nails. I applied a generous helping on each top piece, hung them, and held them in place with blue painters tape while the adhesive cured for 24 hours.
Success!
By the way, I really wish I'd just hung everything with Liquid Nails. It may or may not have been a valid process, but it would have been faster and not left behind so many pesky holes.
To take care of these bad boys, I grabbed a tube of stainable wood filler, and set to work transforming the unsightly holes into unsightly spots.
I waited for it to dry, then used a q-tip to apply several coats of stain to the spots until they about matched the rest of the wood.
Certainly not perfect camouflage, but far less noticeable.
Total project time from start to finish: 8 months
Total project time since reactivation: 4 weeks
Total actual productive project time: probably 3 hours (and counting)
What's with the "and counting"? Well I still need to seal the deal by applying a few coats of Polyurethane, but that should be straightforward and uneventful, though if something does go awry I'm giving up and setting fire to the house.
For all intents and purposes, this is done!
Looks cozy, modern, helped along by the softer paint color.
Yes maybe it's crooked in a couple of places, and there may be some gaps, and the stain is uneven, and the 3/8" reveal is more like a 1/2" reveal in some places or 2/8" in others, and this doorway still matches nothing else in the house...But deep breath, big picture, it ain't half bad. I might be turning this into a metaphor for life again. In this case, I'll take it.
- Demolition
- Complaints
- Shopping
- Emotional turmoil
- General grumpiness
And basically, I managed to get my hands on all the pine boards and casing I'd need to construct the doorway of my dreams.
First up, I'd need to stain everything. At some point during the lull in production since February, I had managed to test out some stain options on a spare board.
Starting from the bottom in this picture, we have Golden Oak, which was a nice color but too light (it is actually lighter in person). Then Walnut, which matches the house's orange glow finish we're trying to avoid. Next up is Red Mahogany, which showed promise. Then at the top, I thought I'd give English Chestnut another chance. While it had turned out to be too dark when applied to the window frame, it wasn't actually a bad color. When we tried it on the test board, it turned out to be a different shade than the window frame. It's magical, I tell ya.
I was leaning toward the Mahogany up until the morning I was set to stain. Then I had a change of heart, drawn to the English Chestnut. It was clean and modern, nicely highlighting the wood grain. It looked natural. The Mahogany was purple and cheesy.
We lined up all the wood on a table outside and got to work.
Before applying stain, I rubbed down the boards with Minwax Pre-Stain, which is supposed to encourage even staining and prevent marbling on soft, absorbent woods like pine. It was an easy enough step that did no such thing, as the stained boards turned out uneven and marbled.
Also, they were neither the color of the window frame, nor the test board, but a completely original third version of English Chestnut. But whatever.
![]() |
Casing |
We attached them to the frame using finishing screws, following the recommendation of DIY Dave. All of my research instructed me to use finishing nails. But finishing nails are meant to be used with a nail gun, and the nail gun I intended to borrow from our friends turned out to require, as all nail guns do, an air compressor the size and shape of an Airstream trailer. Meanwhile, finishing screws require a plain old screw gun, a power tool I already knew how to manage
I used too many screws, but in the end, I had the whole door jamb hung. Taking no time to celebrate, I moved on to hanging the casing. This is where things went wrong. The screws wouldn't go all the way through in seemingly random places, but then they also wouldn't retreat out of the holes when I determined I needed to start over, so I'd wind up ripping everything down, banging the screws out backward with a hammer, and making a bunch of excess holes. This happened twice and I gave up for the night. Then I resumed work the following evening after work, only to have it happen again.
Finally, I realized that this stubborn screw occurrence wasn't random at all. The screws only went through when they were grabbing onto the wood frame, rather than the plaster wall alongside it. Uh duh. These plaster walls have been a nuisance at every turn, and I should've known these itty bitty screws would never be able to break through.
Once I reached that conclusion, I made sure to drill only into the wood frame and I rather quickly hung the casing on both sides of the doorway, in both the hallway and the ModLodge.
However, when it came time to hang the top pieces, I found that my "just drill into the wood frame" plan only worked if there was a wood frame to drill into. But what was I supposed to do when all I had was a hot mess of busted plaster and exposed... chicken wire?
Against my better judgement, I first tried to use nails, just to see if I'd have any luck. The nails went in okay, but then using only the slightest force, I could take the casing back off, bringing hefty chunks of plaster down with it.
If only there was another way to go about this....
Of course! Glue! Wait, no that doesn't sound technical enough... Adhesive! Yes!
That weekend I went to the store to pick up some Liquid Nails. I applied a generous helping on each top piece, hung them, and held them in place with blue painters tape while the adhesive cured for 24 hours.
Success!
By the way, I really wish I'd just hung everything with Liquid Nails. It may or may not have been a valid process, but it would have been faster and not left behind so many pesky holes.
To take care of these bad boys, I grabbed a tube of stainable wood filler, and set to work transforming the unsightly holes into unsightly spots.
I waited for it to dry, then used a q-tip to apply several coats of stain to the spots until they about matched the rest of the wood.
Certainly not perfect camouflage, but far less noticeable.
Total project time from start to finish: 8 months
Total project time since reactivation: 4 weeks
Total actual productive project time: probably 3 hours (and counting)
What's with the "and counting"? Well I still need to seal the deal by applying a few coats of Polyurethane, but that should be straightforward and uneventful, though if something does go awry I'm giving up and setting fire to the house.
For all intents and purposes, this is done!
Looks cozy, modern, helped along by the softer paint color.
Yes maybe it's crooked in a couple of places, and there may be some gaps, and the stain is uneven, and the 3/8" reveal is more like a 1/2" reveal in some places or 2/8" in others, and this doorway still matches nothing else in the house...But deep breath, big picture, it ain't half bad. I might be turning this into a metaphor for life again. In this case, I'll take it.
Monday, October 12, 2015
This Stupid Doorway
I'm not in a great head space lately. My days are very full and very long. Devin is working absurd hours, which means that I spend most nights alone with both kids, looking on helplessly while they mess up the house in new and interesting ways. One boy won't go to bed, the other won't stay asleep. I can only hope that chasing around the pair of perpetual motion machines I have for offspring is doing a sufficient job of burning calories because I haven't seen the inside of a gym in months, and I'm eating this for lunch.
And, you know, I'm tired. I don't mean sleepy. I mean tired. In that disturbing way where I don't even feel tired because I'm running on adrenaline. I can hear my brain buzzing. There's always something to wash or cook or buy or pay or plan or respond to or look for or schedule or Google or call customer service about or reassemble. Just keep swimming. Just keep swimming. And since a month-long vacation doesn't appear to be on the horizon, perhaps the better goal is to embrace the exhausted numbness and hope for a psychotic break that results in a Tyler Durden situation because I could really use the extra set of hands.
But deep breath. Big picture. The world is a crazy, messed up place, especially lately, and man am I lucky that everyone I love is happy and healthy and, aside from the impending obesity and dementia, so am I.
I warned you I wasn't in a great head space. Anyway, where was I?
Oh right. This stupid doorway.
In February, as we know, I set about single-handedly demolishing the ModLodge. To make way for the wallpaper, I was going to need to remove all trim and base boards. And because the trim in this room matched nothing else in the house, I wanted to replace it rather than re-hang it.
Shiny new pry bar in hand, I was hesitant to make the first move. This was taking apart my house! What if I couldn't figure out how to put it back together?
I was relieved when I found the trim fell gently away from the wall, like a delicate cod filet flaking apart with a fork. The pry bar may as well have been a backhoe, its involvement was so gratuitous.
As I'd suspected, all baseboards, the doorjamb and door casing were made from flimsy particle board, slathered with glossy white primer.
The finishing nails couldn't get a grip on the stubborn plaster walls, so the trim was held very loosely in place and I managed to yank everything down in a matter of minutes. HULK SMASH!
The mass destruction gave me a rush of empowerment. I was fearless. And that fearlessness guided me through the window frame refinishing, the spindle removal, and all other assorted ModLodge projects in that time period.
Then I needed to take a break to re-calibrate my work/life balance and so for, oh, seven months, the doorway looked like this.
After a while I didn't even notice it. If you leave anything long enough-- a basket of unfolded laundry on the dining room table, a 16 pack of paper towels in the middle of the kitchen-- it just sort of blends in.
From time to time I would Pinterest new looks, take measurements and make lists. I relentlessly texted my friend Dave, who is redoing his whole house, for advice and guidance. Yet while I could find the time to plan, I couldn't seem to make room in my schedule for the actual labor.
In the evenings, when the kids were in bed and the house was quiet, I would stare at the exposed wood and the chipped plaster and feel hopeless. Why did I get myself into this? Who was I kidding, thinking I could handle a project of this magnitude during a chaotic time in my life? I suck at this. I suck at everything. Why can't I just get it together and figure this out?
Then I'd snap out of it and remember this was not about life, this was about a stupid doorway and I should really refrain from making an allegory out of a simple hobby. This was supposed to be fun damn it.
After several weekends of false starts, I finally woke up one Saturday morning and immediately set out for Home Depot, supply list in hand. I brought Milo, which I realized was a bad call because it would be difficult and dangerous to maneuver lumber onto a cart with a hyperactive baby strapped to my chest. As it turns out, I would never have to take that risk because I couldn't find the materials I needed.
I was trying to do things the easy way by purchasing a natural wood (as opposed to primed) door jamb kit that I would stain to the color of my choosing. In the size I needed, Home Depot had fingerjoint pine, meaning it looks just good enough to paint over, but they didn't have "clear" pine. Nor did Lowe's. Nor did an independent shop specializing in doors, which I drove all the way out to only to find it had gone out of business. I made a few more phone calls to home and hardware stores and in short, I learned that door jamb kits can be stainable grade pine, and they can be plaster wall width (5 1/4"), but they can not be both. Why not? For no good reason whatsoever. I wanted to cry. I canned the project for the weekend.
I picked it back up the weekend after by driving to Anawalt Lumber (alone) to attempt, once again, to pick up supplies. No kits. I would need to do this all from scratch. I walked into the warehouse and immediately felt a wave of panic.
This was no Home Depot with its consumer friendly signage and "let's do this!" tutorials. This was an actual lumber yard. Everything looked so tall and heavy. Once again, I wanted to cry. The self-doubt crept back in. Where was that fearlessness that got me into this mess in the first place?
But before I could back out, an employee named Tino came to my rescue. I surrendered my sad drawing of the doorway with scribbled measurements and admitted I had no idea what to do. He took pity on me, though I'm sure he is very sick of customers who require this much handholding.
He very patiently lead me around figuring out the right materials, making notes on a slip of paper. Then he cut everything down to size, leaving a few extra inches on the pieces of door casing because I was second guessing my measurements. When he summoned me over to collect my pile of stuff, I thought he was going to wish me luck or perhaps pat me on the head. Instead he gestured over to the pile while turning away to speak to his next customer.
I loaded everything easily into the minivan (#vanlife) and drove home, hopeful, and unjustly satisfied as if I'd solved my own problem back there.
Finally I had the pieces to the puzzle, but would I be able to put it all together? Find out in part 2...
Tuesday, August 25, 2015
ModLodge Proj: Removing A Half Spindle
As I've made perfectly clear, the ModLodge "wallpaper project," which became the "baseboard removing, wall priming, window frame refinishing, FINE we'll just paint project" was full of distractions. One that I've yet to share with you is a self contained little enterprise that took place within this same timeframe: removing the half spindle from the wall that divides the ModLodge and the ugly kitchen.
To be honest with you, I don't have a problem with spindles. I actually have a thing for decades-old interior design relics. Sometimes I think it would be easier to lean in to the outdatedness of our house and just try to look like the Hamilton house in Fast Times at Ridgemont High.
Or, you know what I've always really liked? The house from E.T.
Come on. I cannot be the only person that thinks this is amazing.
![]() |
dat macrame hanging planter doe |
So why am I bringing all of this up? Well, for one thing, I think in tangents these days. But mostly because this conflict of aesthetics is a recurring theme in many of my projects, ongoing and forthcoming, and now that I've gotten the deeper explanation out of the way I can always refer to it with a quick mention.
Back to the spindle. As part of the wallpaper prep I was sanding a particularly pesky paint glob on the wall, right next to the spindle. Being up close, I saw that there was just the thinnest gap where it met the wall.
Up until that point I swear it had never even crossed my mind to remove the spindle. And yet all of a sudden...
I put down the sandpaper and picked up my new 14-In-One Painter's Tool.
Nowhere on the packaging does it identify the 14 uses. So far I've found that it opens paint cans (1), scrapes dried paint splatters off the floor (2), scrapes old paint off the wall (3), hammers paint can lids back on sort of (4), and ushers you into unnecessary side projects by prying perfectly harmless spindles away from the wall (5).
Once I'd widened the space a little more, I was able to wedge in my new pry bar and cross the point of no return.
It separated from the wall rather easily with a series of satisfying cracking sounds. But then I met resistance. After clearing a half inch space I realized there was a problem with my plan: I hadn't given any thought to it whatsoever.
I started inspecting the area to figure out where the spindle was adhered. I opened the cabinets underneath, thinking perhaps it was screwed in that way (because in my mind everything is built like Ikea furniture).
No dice.
Then I noticed the tiniest little nail driven into the base, and down at an angle. Ah ha!
There was no wiggle room to try to pry up from the bottom of the spindle, or down from the top. This sucker was going to need to get sawed in half and removed in sections.
Time to call in the muscle.

With the spindle split in two, it popped right off of the nails and we were in the clear!

...and we'd also sliced into the wall. Eh.

Knowing there'd be some more work to do to clean this up, I turned my attention back to my original baseboard removing, wall priming, window frame refinishing, FINE we'll just paint project.
For 6 weeks after that, nothing happened.
Then one day in late April, I patched up the holes and grabbed the can of leftover White Clay paint from the garage.

Unfortunately, there was this noticeable seam where several layers of paint had built up alongside the totally bare wall that was under the spindle. I used my painters tool to scrape away the old paint and level it out.
Then I slapped on a few coats of fresh paint and called it a day.

There are still noticeable squares in the bar and ceiling beam that show evidence of the spindle's existence. I've got a solution in mind for those, but it'll have to wait until I'm in the middle of another unrelated project.
![]() |
Before |
After |
Subscribe to:
Posts (Atom)